75 Adding Images
Pressbooks handles images well, for web, EPUB and PDF outputs.
Uploading Images
In order to add images, click on the Add Media button in your chapter editor:
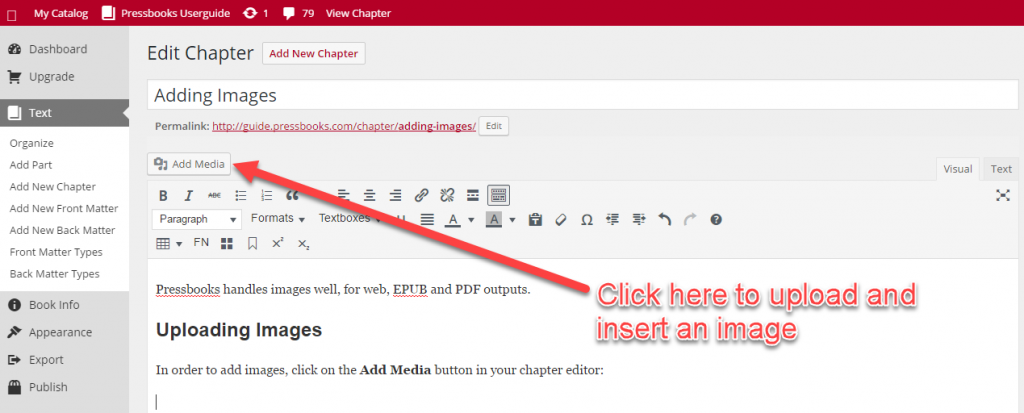
Next, upload your image either by dragging and dropping the image file from your computer to the upload box, or by clicking “Select File” to find the file in your computer. You can also choose from existing files in your Media Library.
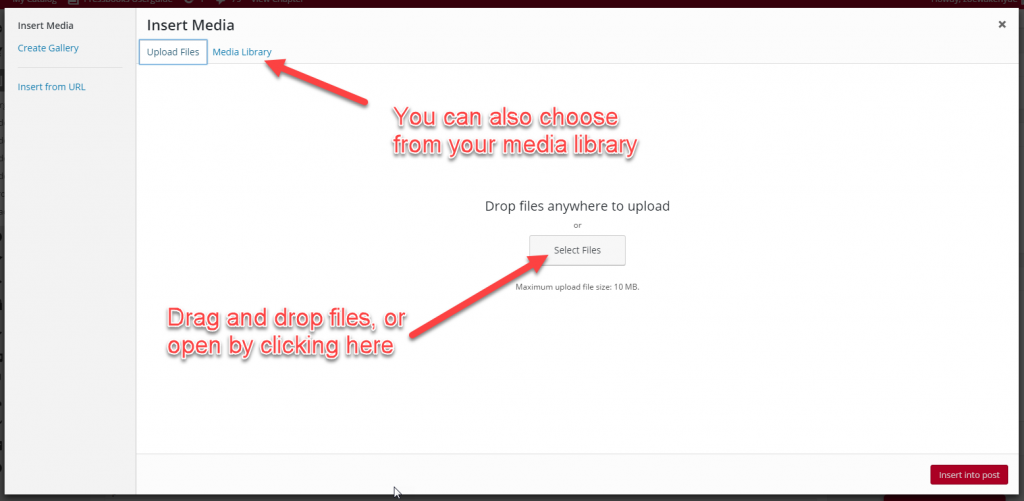
Settings, when Uploading an Image
Finally, you’ll want to select the size of the file, the URL of the file, caption and a few other things. We recommend centering your image, and adding a caption. Once you have added your settings as desired, click “Insert into Post”.
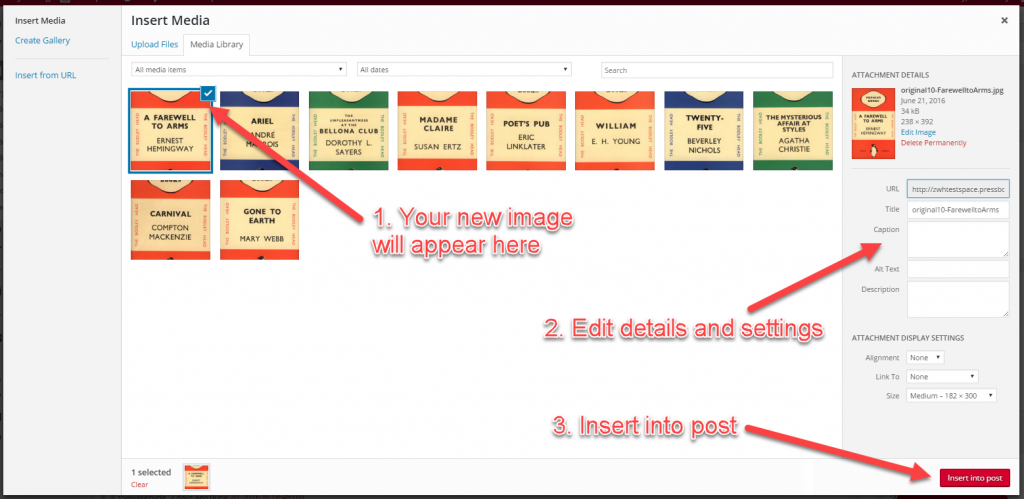
Changing Your Image Settings
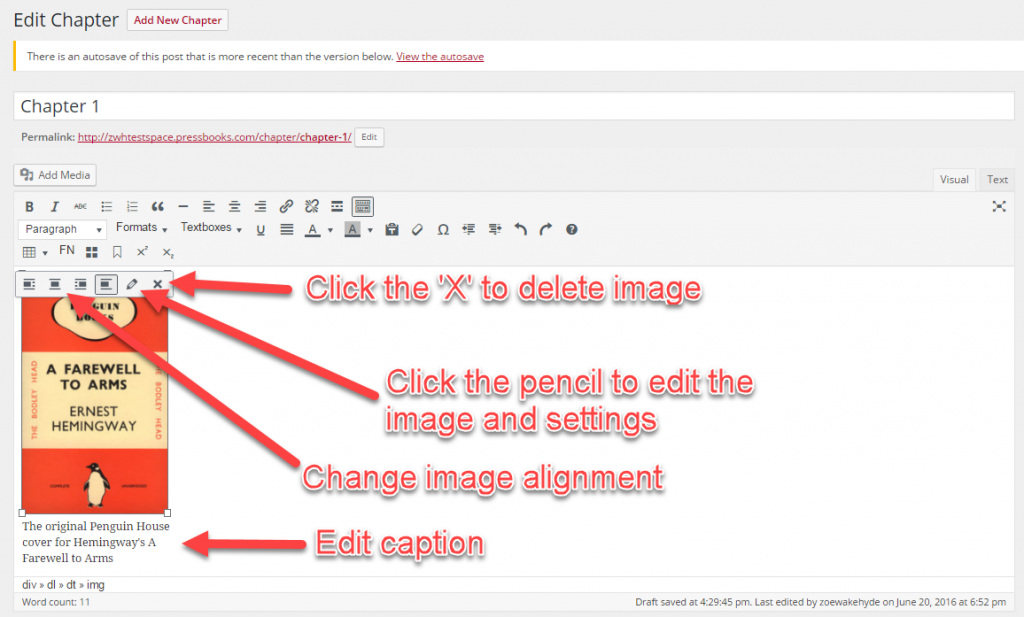
Finally, if you would like to change the settings on an image after it has been added to a post, go to the chapter editor and click on the image. You’ll see a few small icons appear:
- Click on the ‘X’ to delete the imag.e
- Click on the pencil to open the editing screen (see below).
- Click on any of the other icons to change the image alignment.
You can also edit the image caption at any time without opening the clicking on the existing caption and typing as normal.
Editing Screen
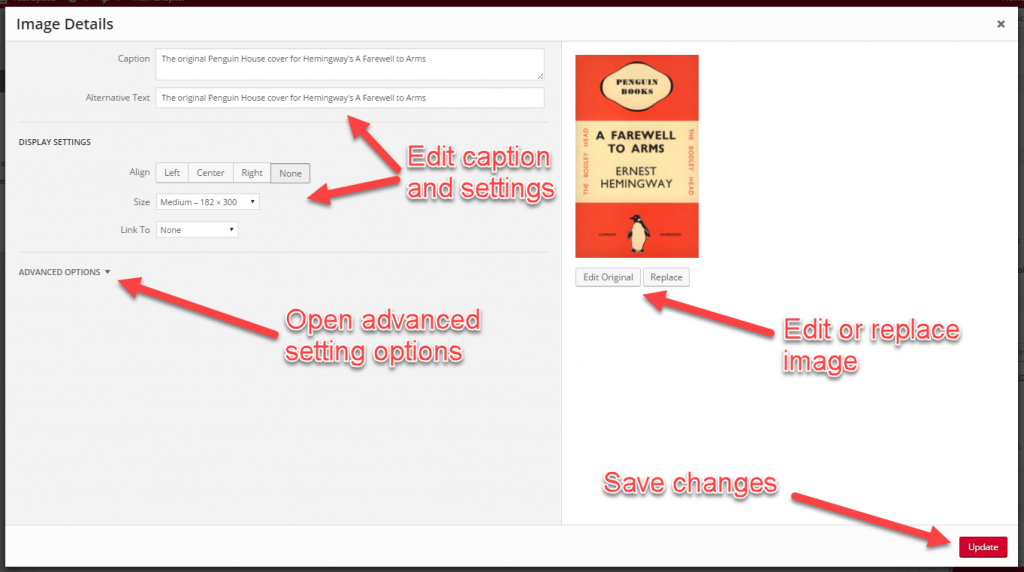
By clicking on the pencil, you open the image editing screen. Here, you can edit the following:
- Caption (note: this is important to include for ebooks especially as images without captions may not render properly in some e-readers)
- Alternate text (this is important for both SEO and accessibility for visually impaired people using screen readers)
- Image alignment
- Image size
- Linking preferences (you can link to the image file, an attachment page, a custom URL or have no link)
- Access the “Advanced Options” and image editor (more on this below)
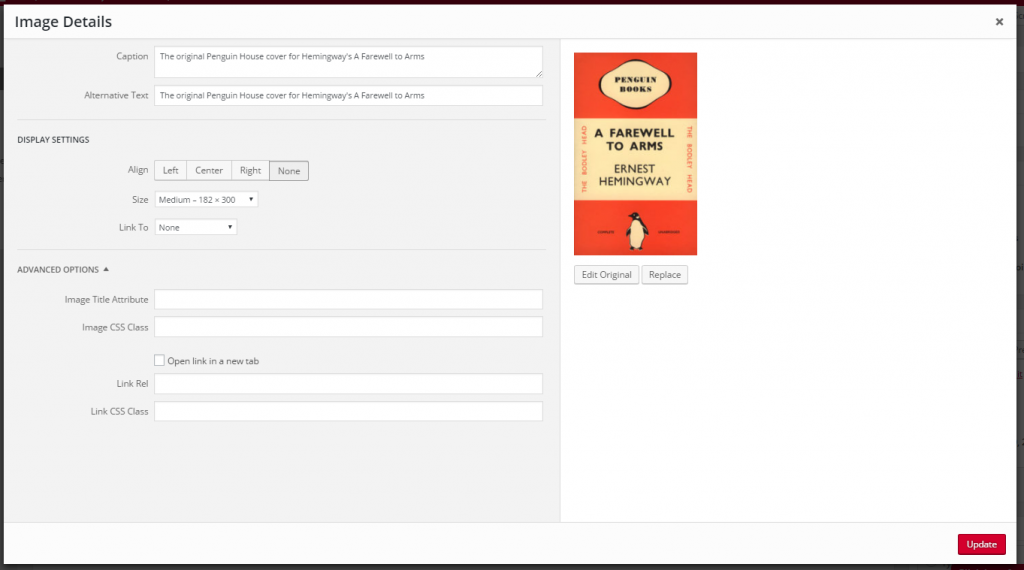
From the image editing panel, you can also go to the advanced image settings panel. Here, you can set an attribute for the image title, as well as a CSS class for both the image and its link. This allows you to classify each element so that you can then style them differently from other images in your book by using the custom CSS editor. Read more in our chapter on custom CSS.
Editing Your Image
In addition to changing your image settings, the editing screen also allows you some basic editing options for the image itself. By clicking on “Edit Original” you will see a new window with several options to crop, rotate and scale your image. Read more in our chapter on image editing or check out our video tutorial for more details.

